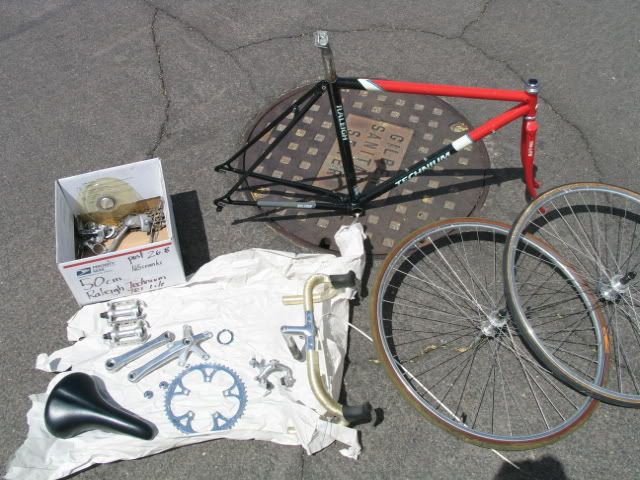
This is the second part of the three part series on how to convert a bike into a fixed gear. Now you have the bike disassembled and separated with parts you intend to reuse and the parts you can then recycle. Now it comes time to go shopping, you need to buy a couple of things.
- Narrower Bottom Bracket
- Axle Spacers
- Single Chainring bolts
- New Track Cog
- New Chain that matches the width of Track Cog
Gear selection is a personal choice like clothing. Many combinations will work but well fitting clothes work much better than ill fitting clothes. If you are focused on a budget fixed gear you need to reuse the maximum amount of your existing stash o'parts. Let's start with counting the number of teeth on your current large chainring. Why the large ring? Well in my opinion the larger ring looks better, runs quieter, and feels smoother. You can choose either so I have written the guide to cover both situations.
So if you are using a,
- 53T-49T chainring start with a 17T cog, average ratio 3.0
- 48T-45T chainring start with a 16T cog, average ratio 2.9
- 44T-39T chainring start with a 15T cog, average ratio 2.8
If you have a chainring not listed go for a cog that represents a Ring: Cog Ratio closest to 2.9:1.
The second step is how to customize this guideline to your particular cog size given personal factors. See if any below fit your situation.
- Weak Legs-add a tooth
- Weak Character- add one
- Ride above 20mph average- take away one
- Flat Terrain- leave it alone
- Moderate Terrain- add one
- Demanding Terrain- add two
- Running 27" wheels- add one
- Running 650c or 26" wheels-take away one
Got your own add one, take away one criteria? Hit me with your comments.


Comments